 This example shows that when a channel lacks color information, it is very effective to use channel mixers to borrow color information from other channels. The use of a channel mixer must have a deeper understanding of color, analyze what color needs to be added or subtracted, and what channel is used as the output channel.
2. Use channel mixer to adjust image saturation
Adding black or increasing the opposite color dot can reduce the saturation of the image. Using this principle, adding black or the opposite color to reduce the saturation color can achieve the goal. Similarly, lowering the black or reducing the dots of opposite colors in the color can increase the saturation of the image. Using this principle, the purpose of reducing the dot size of K or reducing the dot size of the opposite color in the color to increase the saturation can be achieved. For example, using a channel mixer can increase the saturation of color C80%Y100%K20%: first analyze that the color should be green, and C80%Y100%K20% of the opposite color is K20%. Using Hue/Saturation tools can not achieve the purpose of improving the saturation, use the channel mixer can achieve this goal. Select the output channel as "black" channel, adjust the left or right slider of the source channel to change the color to C80% and Y100%.
3. Create a grayscale image using the channel mixer
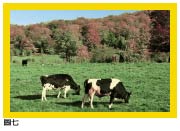
Sometimes we want to convert a color image to a gray image. If you perform the operation of converting to "grayscale" directly in the color mode, you may not get the desired result. Because this conversion is based on the depth of the color, the dot size of each channel is not considered. The shades of yellow, magenta, and cyan are different. If the channel mixer is used for conversion, specific adjustments can be made to adjust the contribution of each channel in forming a gray color. The adjustment method is shown in Figure VIII. Select monochrome, and then adjust the size of each channel, that is, the channel of each channel is added to the black channel according to the ratio in the figure. The resulting image color mode remains unchanged. If the original CMYK color mode is selected, only the black channel has color information. The other three channels are all 0%, which is white. Fig. 9 shows the result of Fig. 7 that is directly converted to "grayscale" in the color mode. Fig. 10 and Fig. 11 are grayscale images created by the channel mixer. It can be seen that they are different.
4. Create a picture with a tone using the channel mixer
Using the channel mixer can also be creative design, so that the image is biased to a certain color, get unexpected results. The following is an illustration of Figure 7 as an example.
In the first step, perform the channel mixer operation, select "Monochrome", and then remove the "Monochrome" selection. At this time, the channel mixer will look like Figure 12, and the output channel will be displayed as "black". At this time, the channel tool shows that only the black channel has an image and the other three channels are blank.
In the second step, select “Cyanâ€, “Yellowâ€, and “Magenta†respectively in the output channel to adjust each slider in the channel mixer until a satisfactory result appears.
The third step, click "OK" to end the operation. Figure 13 shows the result of an operation.
Bopp Packing Tape,Stationery Tape Co., Ltd. , http://www.nspackingtapes.com