Failure phenomenon
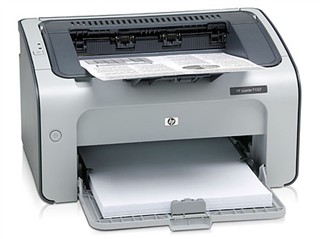
After an HP HP LaserJet 1010 laser printer was used for a period of time, the paper feed was normal during online printing, but no handwriting was printed.
Analysis and maintenance: We know that HP HP LaserJet 1010 laser printer is currently using HP's unique instant fuser technology, up to 12ppm (A4, letter) printing speed; application HP resolution enhancement technology (REt), resolution Up to 600 dpi; monthly print load of up to 5,000 pages, 8MBRAM flagship product, in today's party and government agencies, large and medium-sized enterprises and institutions, financial and securities service industries and other fields occupies a certain proportion.
Next, according to the fault phenomenon, the author first checks whether the computer and its peripherals (print cable, printer connection bayonet, power outlet, etc.) hardware part is normal; if there is no exception, you can initially exclude the computer and its peripheral hardware Failure, it is determined that the HP laser printer itself is the result of failure. Nothing is printed. Follow these steps to eliminate them one by one:
1, first replace the new cartridge to see if the fault disappears. When replacing, check whether the toner seal is pulled out and the toner has run out. If the sealing strip is not pulled out or the toner has run out, it will cause no sign; however, if the toner is out of toner, the faulty phenomenon is that the output proofs gradually become lighter in the middle of the longitudinal direction, and the red light blinks continuously. The alarm indicates that the toner in the toner cartridge is about to run out. The phenomenon of no printing is very rare, and it takes a long period of time after the image is lightened, so the reason for the absence of toner in the toner cartridge is basically eliminated.
2, then check the HP laser printer cartridge is faulty. A careful inspection revealed traces of toner on the surface of the drum, so it was determined that there was no problem with the developed part of the printer. The problem was that the handwriting was transferred from the cartridge drum to the paper.
3. Finally, check the electrode wire on the transfer electrode assembly, and found that the electrode wire did not melt off, but a large amount of black powder was attached to the front and rear of the electrode wire, thereby determining that the fault was caused by a large amount of charged powder and the electrode wire could not occur. The normal corona discharge, or the corona discharge voltage is too low, can not adsorb the negatively charged developing toner to the paper, resulting in no handwriting phenomenon on the printing paper.
The solution is to use a small amount of clean cotton to take a small amount of methyl ethyl ketone, gently wipe off in the off state, remove the toner on the transfer electrode assembly around the electrode wire. After cleaning up, use a small amount of cotton to take a small amount of absolute alcohol to wipe it again, wait for the alcohol to evaporate and reinstall it in place. When it is turned on, the text is printed normally and the fault is eliminated.
Symptom II
A Epson Epson laser printer has a significantly longer running time when it is turned on after being turned on. After it is completed, it displays “MOB5â€. All green LEDs are off and the connection is not printed.
Analysis and maintenance: The boot can be self-test operation, indicating that the mechanical part of the laser printer is basically normal. After the power was turned off, the cartridges were opened in sequence to check the cartridges and toner. No abnormality was observed. According to the long-term self-check operation time, the initial judgment of the fault phenomenon may be related to the paper path fault. Because there is no ready-made circuit diagram and related data in the hand, the laser printer can only check the physical map of the laser printer one by one. The one-by-one inspection found that the aircraft only has one circuit sensor. Remove the sensor and use a multimeter to measure the ohm range. It is found that the resistance value of the sensor when it is in and out of action is extremely unstable, and it is concluded that the sensor is the cause of the abnormal operation of the printer.
Since it is difficult to buy such sensors of the same type in the market, it is advisable to repair them. Carefully disassemble the sensor and found that the internal action of the contact parts has been seriously oxidized to appear green patina due to long use. First use a tool knife to carefully scrape off the surface oxide layer, then pour a little anhydrous alcohol several times to clean it several times, take out the hair dryer and slowly dry it at low temperature, and then put it into place as it is (since its volume is only a few millimeters, the assembly process Be very careful so as not to damage the hook and lose the spring). Finally, the sensor is loaded into the laser printer, and it is restarted and trial run. Online printing is normal and troubleshooting is performed.